This is an old revision of the document!
Table of Contents
User Notifications Portal
This page is a step-by-step overview of the User Notifications page on the ROSCOLive add-on in MyGeotab.
NOTE: Only users with Supervisor security group permissions and above can create and edit Notification Users
To navigate to this page, select the Notification Portal option on the Rosco Live add-on menu.

Notification Portal Overview
The Notification Portal page is used to view fleet notifications and add notification recipients. Notification recipients are user who will receive notifications through email about when exceptions occur.
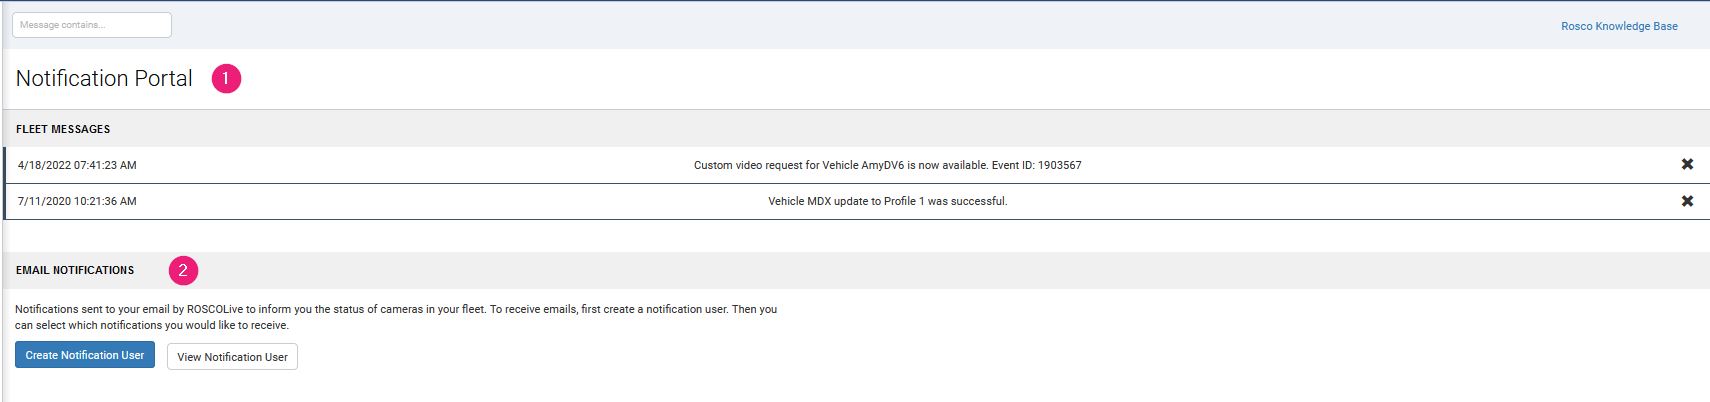
1. Fleet Messages
This section is where all fleet messages and notifications will appear. These notifications range from when a vehicle's profile has been successfully updated or when a custom video request is now available for viewing. To clear a message, simply click the X at the far right of the notification.
2. Email Notifications
If a user is interested in receiving email notifications, they will need to be added as a Notification Recipient here. You can also view and edit existing notification users by clicking the View Notification User button.
Add a New Notification Recipient
Step 1. Select Create Notification User
To add a new notification recipient, first click the Create Notification User button.

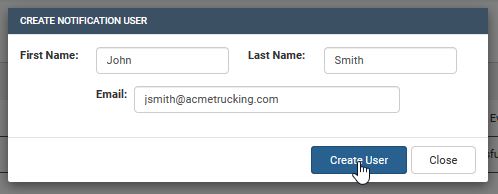
Step 2. Enter New Notification Recipient Information
Enter the relevant information into the text-fields and select Create User to create the new notification recipient.
Step 3. Save New Notification Recipient
When successful, a notification will appear in the upper right corner of the page.
Edit Notification Recipient Data & Notifications
Step 1. Select Edit User Button
Select the User Data & Notifications button on the right side of the page to open the User Data menu.

Step 2. Select Email Notifications
This is the User Data & Notifications page, used to edit notification recipient information and customize what events and reports they are notified about.

- User Data - This section includes the notification recipient's email, first name, and last name. The name fields are editable, however the email field is not.
- Email Notifications - This section is for the selection of what type of event notifications the user will receive.
- Agregate Notifications - This option consolidates excessive event and alert notifications into an automated email and sends this every two hours. Excessive alerts are ones that occur every 5 seconds or less.
- Inactive Vehicle - When active, sends an email when a vehicle has been inactive for more than 5 days.
- Alert Summary - When active, this sends a daily email that contains a summary of devices and alerts generated by them.
- Data Usage Notifications - When a vehicle exceeds 75%, 90%, and 100% of the allocated data limit, a notification is sent.
- Input Sensor - When active, sends an alert notification when a input sensor on the vehicle is triggered.
- Company Audit Notification - Sends an audit report of all vehicles that includes number of events generated, last connected to server, and amount of data transferred.
After making any changes, select Save Change.
Delete a Notification Recipient
To delete a notification recipient, select the X button located on the right side of the page.
