This is an old revision of the document!
Table of Contents
Camera Status Page
This page is a step-by-step overview of the Camera Status page on RoscoLive add-on for MyGeotab.
Navigate to the Camera Status Page
Locate and select the Camera Status icon in the side menu.

Camera Status Page Overview
The Camera Status page displays more information related to the status of the camera such as firmware version, current fleet config profile, and SD card status. If any action is needed, such as remote reformat, firmware upgrade, or configuration change, a user can select the desired devices and apply an action (or actions) using the Fleet Tool options in the search header bar. This page is also used to pair cameras to GO devices and shows which devices are paired to which cameras.

- Search Bar Group - This group of options allows you to easily search and filter devices
- Search Bar - A camera can be searched by entering the name here.
- Groups - The cameras can be filtered by Groups. For more information about camera grouping, reference this page.
- Firmware Upgrade - Brings up the Fleet Firmware upgrade menu which allows you to select a firmware version to upgrade the selected cameras.
- Change Config - Opens the Change Config menu which is used to select a fleet config profile to apply to the selected cameras.
- Format SD Card - Opens the Format SD Card menu which allows you to remote format the SD cards of the selected devices.
- Report - Exports a report of the information in the Cameras table. Also allows for customization of the report.
- Cameras Table - The table in which camera information and statuses are displayed in the respective columns. The columns can be dragged and dropped in the order in which you choose. the content of the columns will be detailed in a section below.
- Camera Selection - Options which allow you to select cameras to apply actions to.
Cameras Table
This section will detail the contents of each column in the Cameras Table
Name

This column displays the name of the camera and below that, the MyGeotab group the camera is associated with if paired to a GO device.
Clicking on the camera name will open a modal which will allow the user to change the camera name and change the timezone the camera is set to.

Paired GO Device
 This column displays the name and s/n of the paired go device to the camera.
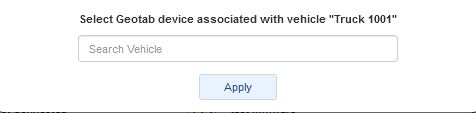
If a camera is not paired, the following will be displayed:

To pair a device, select the icon button to the right and select the GO device from the menu that appears and select apply.
Service Connectivity
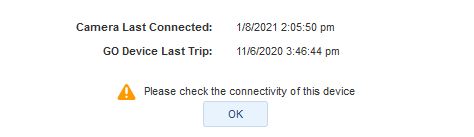
 This column displays the last connected date and time of the camera. This column will also alert the user if the difference between the last connected time of the camera and the last trip of the connected GO device exceeds 24 hours.
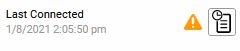 To see both the camera last connected date and the GO device last trip, clicking the icon button on the right will open the following menu:
Firmware Status
 This column displays the current firmware status and version on the camera.
Fleet Config Profile
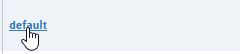
 This column displays the current config profile applied to the camera. If profile says Manual, this means that a config file was manually uploaded to the camera or changed locally on the SD card.
Clicking on the profile name will take the user to the Fleet Config Profile page to view/change the profile if needed.
SD Card Status
 This column displays the status of the camera's SD card.
Service Status
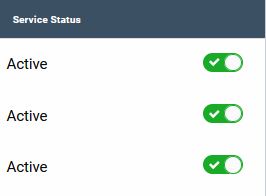 This column allows Admin users to enable or disable their cameras. When a camera is Inactive this means the camera will no longer be allowed to send or receive any data from the server. This means that no event video or snapshots will be uploaded, no live streaming will be available, no custom video requests will be allowed. The camera will still continue to record video and operate normally offline.
Selecting Cameras
To select cameras to perform an action on them such as pushing a new fleet config profile to them, select the drop down button located at the top right-hand corner of the page. From here you can select some options on how you would like to select cameras.

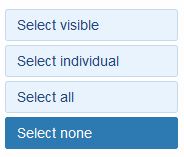
- Select Visible - Selects all devices that are currently visible on the screen. This is helpful when you want to only select a certain group of devices without selecting all devices in the fleet.
- Select Individual - Allows the user to select individual devices.
- Select All - Selects all of the devices in the fleet.
- Select None - Deselects any devices selected and hides the selection checkboxes on screen