Table of Contents
User Notifications Portal
This page is a step-by-step overview of the User Notifications page on the ROSCOLive add-on in MyGeotab.
NOTE: Only users with Supervisor security group permissions and above can create and edit Notification Users
To navigate to this page, select the Notification Portal option on the Rosco Live add-on menu.

Notification Portal Overview
The Notification Portal page is used to view fleet notifications and add notification recipients. Notification recipients are user who will receive notifications through email about when exceptions occur.
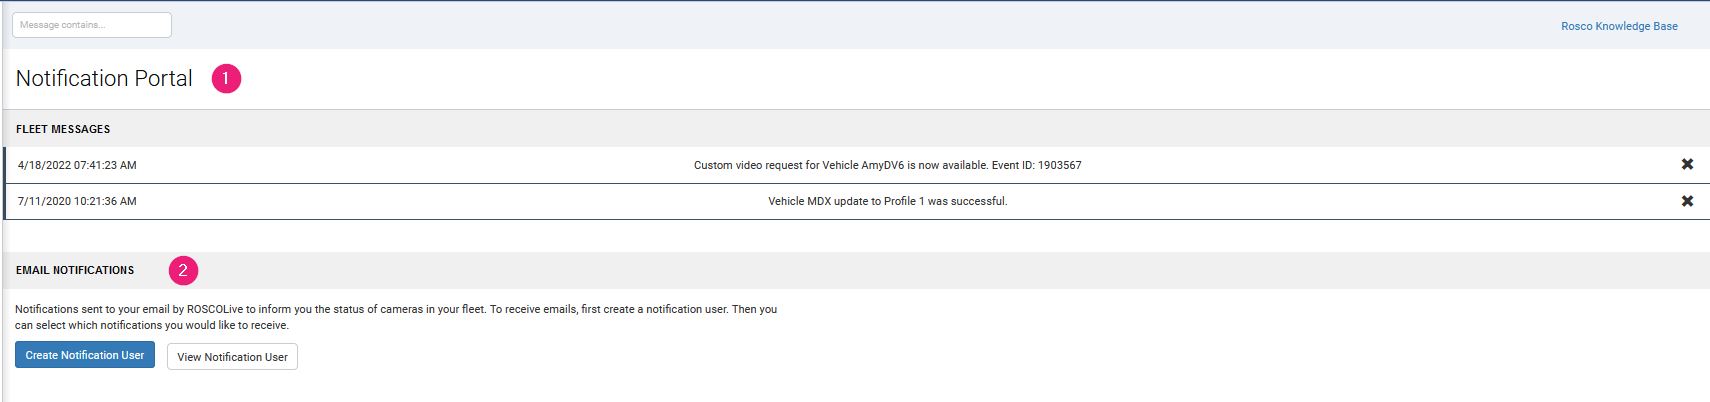
1. Fleet Messages
This section is where all fleet messages and notifications will appear. These notifications range from when a vehicle's profile has been successfully updated or when a custom video request is now available for viewing. To clear a message, simply click the X at the far right of the notification.
2. Email Notifications
If a user is interested in receiving email notifications, they will need to be added as a Notification Recipient here. You can also view and edit existing notification users by clicking the View Notification User button.
Add a New Notification Recipient
Step 1. Select Create Notification User
To add a new notification recipient, first click the Create Notification User button.

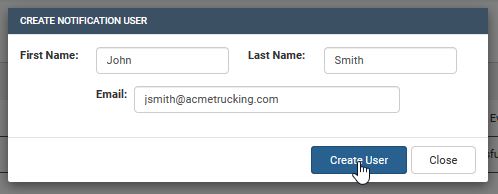
Step 2. Enter New Notification Recipient Information
Enter the relevant information into the text-fields and select Create User to create the new notification recipient.
Step 3. Save New Notification Recipient
When successful, a notification will appear in the upper right corner of the page.
Edit Notification Recipient Data & Notifications
Step 1. Select View Notification User Button
Select the View Notification User button in the EMAIL NOTIFICATIONS section.

Step 2. Select Edit Notifications
This is the Edit Notifications page, used to edit notification recipient information and customize what events and reports they are notified about.


- User Data - This section includes the notification recipient's email, first name, and last name. The name fields are editable, however the email field is not.
- Email Notifications - This section is for the selection of what type of event notifications the user will receive.
- Camera Health Alerts - These alert notifications inform of the camera's health and functionality.
- Fleet Status - These notifications inform about the status of different aspects within your fleet.
After making any changes, select Save Change.
Delete a Notification Recipient
Step 1. Select View Notification User Button
Select the View Notification User button in the EMAIL NOTIFICATIONS section.
Step 2. Click Delete User Button
Click the Delete User button next to the user you wish to remove.

Step 3. Confirm User Deletion
After clicking the Delete User button, a pop up will appear asking you to confirm. If you want to delete the user, click Delete, otherwise click Close to close the pop up.
